Saturday, April 29, 2017

Enable Power BI Integration for Dynamics 365


Microsoft Dynamics 365 (CRM with Power BI

Dynamics 365 and go to Settings-> Administration -> System Settings -> Reporting. We have to change this setting from “No” to “Yes”:

This is all the setup we need to do in Dynamics 365.

We also need a Power BI dashboard to import into Dynamics 365.

We are going to connect to one of the Content Packs made for Dynamics 365 inside Power BI, so we need the OData feed from D365.

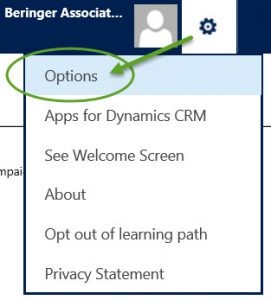
Go to Settings-> Customizations ->Developer Resources:

copy the  following information (https://”yourtenant”.crm4.dynamics.com) to a notepad document.

We do not need “api/data/v8.2”, Power BI will add this to the URL:

Now, head over to Powerbi.com and login with the same account as you are logged into in Dynamics 365. Open up the side-bar menu and go to “Get Data”:

Under the Content Pack Library choese “Services”. Press “Get”:

This will take us to the AppSource library. search for the content pack (Sales Analytics for Dynamics 365) or go to page 2, it should be at the top. Press “Get it now”:

Copy the OData URL you saved in the notepad file and paste it into the first textbox and select a Fiscal Year End Month Number. I just inserted “12”.

Power BI will inform you that it has started to import you data and your dashboard should look something like this after a couple of minutes:

We have our Content Pack imported successfully.
insert this into a dashboard in Dynamics 365. Go back to your D365 instance, select “Sales” and “Dashboards”. D365 will start loading the default system dashboard.


Power BI dashboards can only be inserted into Personal Dashboards, so we have to create a new one. Select “New” -> Power BI Dashboard from the menu bar:

You may have to login again with your credentials. After that you will be able to chose from your dashboards in Power BI.

Go ahead and select the Sales Analytics for Dynamics 365 dashboard you just imported to Power BI.

You can also chose to “Enable for mobile” which will make the dashboard scale better on a mobile device.

Press “Save” and then your dashboard should look like this in D365:

Clicking on the different dashboards tiles will take you to the underlying reports (10 different reports in this example) where you can filter and use the interactive functionality you have in Power BI.

You can also go directly to Powerbi.com by pressing the PowerBi icon in the top right corner.

Done! -  to share this dashboard with other colleagues in your organization share the dashboard in PowerBI.

Then the users can import it to their personal dashboard inside D365, so security is pretty much handled by PowerBI.

The content packs made by Microsoft gives you a great starting point for reports

Sunday, April 16, 2017

Business Rules or Javascript?

In Dynamics 365, both JavaScript and Business Rules allow you to add business logic to your forms. For example, you can use these both to conditionally hide fields, set default values or enforce field requirements. Both JavaScript and Business Rules work in a variety of environments outside of the native Dynamics 365 web browser version. This includes Dynamics 365 for tablets and even the Dynamics 365 Outlook app (online or offline mode). However, you should be aware of some recognized differences and limitations of each.
 JavaScript
JavaScript requires a developer, and involves adding logic to a form that executes in real time from the end users machine.
·         Developers commonly use it to perform functions that manipulate form elements, such as conditionally hiding/showing fields or enforcing field requirements.
·         This logic can also include changing the value of fields. For example, developers may code it to clear the value of fields once they are hidden on the form.
·         Developers still use JavaScript in Dynamics 365 However, be aware of some well-known issues experienced with the use of JavaScript:
·         The behavior can be different, based on inconsistencies in each end user’s environment (which are difficult to regulate!). This can be true even if the app provider says it’s compatible. While solution providers try their best to make everything compatible in most common environments, there are sometimes noticeable differences in behavior. Even worse, it may not be compatible at all in one users’ environment and therefore not execute.
·         It requires a developer to code and maintain as your business logic changes.
Business Rules
Business Rules were first introduced in Dynamics CRM 2013, but they have since evolved! Business Rules can replace some JavaScript and they require no coding knowledge. Microsoft provides a simple, declarative interface that your system administrator can use to create a business rule. However, they do require an understanding of both form logic and your business needs.
·         An added benefit over JavaScript is that you can toggle their scope to either work from just the form level or also from the entity level.
·         The entity level enables the rules to run from the server level. This is a nice benefit to organizations that utilize external apps which automatically sync or create records in CRM in the background, such as mobile apps.
·         It ensures that your business logic will continue to execute even if the end user is not creating the record within CRM.
Some important limitations of business rules to keep in mind are:
·         Business Rules will always run when a form loads and the associated field value changes.
·         With JavaScript, you have more flexibility. For example, a developer can configure it to only run when a field value changes or when the record is saved.
·         A scenario where this is important to keep in mind: You have JavaScript that executes on change of a field which then hides other fields and clears their values. You then replace that JavaScript with a Business Rule. Because of the limitation mentioned above, the logic will now also run when the form is loaded.
·         Business Rules haven’t evolved to determine whether a field value is already cleared, so it executes every time. The result? Your end users experience this annoying error closing out of the record, even if they haven’t made any changes:


 Business Rules can only interact with fields. You cannot use those to  specify hiding/showing of entire tabs/sections. A workaround to this is to hide all fields within that tab/section, but that can be cumbersome with many fields on evolving forms. In this scenario, JavaScript may be easier to implement.
 Any JavaScript that fires OnChange of a field will not execute when the field value is changed by a Business Rule. For this reason, it is often recommended not to combine Business Rules and JavaScript. However, this is not always feasible, so it is important to keep in mind.
 If a Business Rule references a field that has been removed from the form, then the rule will not run and an error will not appear. This could also be seen as beneficial, depending on your situation.
 Business Rules are cached on Dynamics 365 for tablets.
If your System Administrator/Customizer changes the logic, then this will not be committed to tablet users until they close and re-open it. 
Most of the time, this should not be an issue unless you have users who work 24/7! 😉
New features of Business Rules in the latest update from Dynamics 365.
Two worth highlighting include:
o   Create a snapshot of an entire Rule. You can use this to share with your team members for input before it is committed to the system.
o   Create business recommendations based on business intelligence. This adds helpful tips next to fields to guide users on filling out forms based on previous data filled in.  A great example provided in Microsoft’s blog is the use of these for product recommendations. For an example, an end user may be filling in a new Opportunity for a prospect. Based on previously identified information such as their age and insurance type, a recommendation can be made for products that other prospects within their group typically purchase.

Troubleshoot Emails in CRM - Pending Send with Server Side Async Settings


There are a lot of components and configuration items involved in the process of having CRM send out messages via email.  This blog focuses on some of the most common user-account-related issues that can cause this situation.

 In CRM, you can run an advanced find for Email Messages with the filter StatusReason = Pending Send.

 Once you have the list, you can open each email to look for specific errors on the actual email record, and also click on the links to the sender and recipient users.

 A few common reasons that your CRM messages get stuck in a pending state are:
1.  The sender or recipient on the email is a disabled user in CRM. Check for status of the user record in the status bar in the lower left and right corners of the user record.


If the sender or recipient of the email is a disabled/read only user in CRM, the only course of action is to delete the email, as the sender or recipient cannot be changed after it is sent in CRM.  When finding this condition, you may want to check across CRM to find and reassign any records owned by the disabled/read only CRM user, so that no further emails will fail with the same error.

 2. The sender does not have “send as” privilege.  Error message “User does not have send-as privilege”

 The error can be addressed through either, checking the email options items below, either within CRM in a browser or under the CRM options through Outlook:

As an alternative, this setting could be pushed out to all CRM users in the organization with a utility like XRM Toolbox – User Settings Utility. This tool can be found here:  https://github.com/MscrmTools/XrmToolBox

3. Sender’s email address has not been approved in CRM. Open the user’s record in CRM and click the “Approve Email” button:

4.  Either the sender or recipient does not have a valid email address in his/her CRM contact or user record.  Check into both sender and recipient records in CRM to make sure that at least the primary email address on each is populated and is valid.  Note that for customers with both CRM online and Exchange online, and using Server-side sync, the sender needs to have an email address that is provided by the Exchange organization and not from an external mail server.

 5. The sender or recipient is a CRM team. This can happen if workflows generate outbound emails and use a variable name (like account owner) to populate the sender/recipient on the message, and act upon a record that is owned by a team. In CRM, a team itself cannot have an email address assigned and so cannot be a sender or recipient of email in CRM.

If the intention is to send the email from CRM to several recipients (like the members of a team) this can be addressed by creating a CRM User named “Accounting Team” for example, with a single email address set in CRM. The email address would be configured as a distribution group on the email server. This approach requires maintenance to keep the distribution list current, but it can allow the notifications to be sent in situations where team ownership is needed for a large/complex account, for example, and all team members need to see updates from CRM.

 6. User’s CRM record mailbox is set to use “CRM for Outlook” for message processing, but the user does not have the CRM client in Outlook installed or actively syncing.

 Set the users mailbox to use Email Router/Server-side-sync for Outgoing email, then wait to see if the stuck messages are processed.

A few common reasons that your CRM messages get stuck in a pending state are:


1. The CRM Email Router service has stopped running or is hung up. Start (or restart) the service, and wait a few minutes to see if pending messages are processed. (You may want to follow that with a restart of the CRM Asynchronous Processing service, since they work side-by-side.)

2. If using the CRM Email Router, open the management console and test connections to user mailboxes and mail server, and address any errors:


o   Click the link to load users/queues. If you get errors, something is wrong with the deployment credentials,  related services, ADFS, SSL cert or IFD configuration. Check the local server logs for errors.

o   Test the connection to the mail server. If you get errors, the mail/SMTP server may be down, IP/name has changed, credentials have changed or the local server may not have permission to access the mail server. Check with your mail/SMTP server administrator for help on resolving

3. The pending message’s sender’s or recipient’s email server mailbox may be full.  Check to be sure that the accounts are not too full to send or receive email. Send a direct message to the sender/recipient of the pending message, to make sure it can be received and that no delivery error is returned.

4. The Email Configuration details in CRM are misconfigured. Make sure that the settings show the correct message transport method – server-side-sync or email router. Your CRM administrator can verify these settings are correct.

5. The service account used in email router for access to CRM or to the mail server has changed. Even if you think or know the credentials have not changed, enter again and save. (Under Configuration profiles and/or Deployments.)

Multiple Email Signatures in CRM 2016 Update 1


Microsoft Dynamics CRM 2016 update 1 functionality that while minor, has a big impact. Create multiple personal email signatures.

This is something we take for granted in all modern email clients, but up until now has not been easily accomplished within CRM .A defined email signature will allow you to save time and be consistent in your email responses within CRM. With this new feature define a default signature, and also create multiple signatures for different circumstances.

Access your personal settings by selecting the Settings button in the upper-right corner of the screen and selecting Options.
From the Set Personal Options windows, click or tap the Email Signature tab.
Click or tap the New button to begin editing your new email signature.
First set the owner of the email signature. By default the owner field will pre-fill with you user account. The owner of the signature can update or delete this signature. Next give the signature a meaningful title. Now you can create the signature body using the text editor.
 Once you’ve finalized the signature, save it by clicking or tapping Save from the command bar. After saving, you can now set it as your default signature by clicking or tapping the Set as Default button on the command bar.

Now that you’ve created your signatures you can easily add it to your email activities within CRM. If you’ve set a default signature, then it will automatically be added to the email when creating a new email activity.

When composing a new email activity, you can also switch between your email signatures. Within the New email window, click or tap the email signature icon from the text editor command bar.

 Then click or tap the email signature you wish to include in the email activity.

 A few things to know about email signatures:

 The owner of an email signature can create, update, or delete it.

o   Each user can have no more than one default email signature

o   When you change the owner of an email signature, the signature reverts to non-default

o   If the From field is changed to a user, the user email signature will appear. When you click Insert Signature, all the signatures that the user owns will appear

CRM Portal - How is it different from a regular website?


While CRM allows to control and record relationships with customers and partners, Portal allows to communicate with end-users, by giving them access to tools they might need and integrate collected data with Dynamics 365.

Website is a front, a powerful lead generation tool, a fancy webpage.

There are 3 types of Portals in Dynamics 365: Community Portal, Partner Portal or Employee and Customer Self-Service Portal.

Each Portal includes OO box solutions with unique features: some include multilingual capabilities, secured content access and more.

While CRM allows to control and record relationships with customers and partners, Portal allows to communicate with end-users, by giving them access to tools they might need and integrate collected data with Dynamics 365.

Microsoft Dynamics 365 Plan 1 already includes Portal with 1 million page views per month (you can purchase additional 0,5 millions views per month).

You can purchase Portal for a test-drive with no licenses for customers and partners access required.

Note: not each partner is a Portal partner (ex. freelance employers are NOT partners).

Request free Dynamics 365 Portal solution here with your Windows Live account. On this page you can also request free Microsoft Social Engagement trial.
Microsoft Dynamics 365 Portal is highly customizable solution.

The Delegated Administrator in CRM


The Delegated Administrator allows us, as a Dynamics CRM Partner, to gain access to a Dynamics CRM organization or O365 Portal without the requirement of a license whatsoever. Previously the delegated admin could only do administrative tasks, but now he can also do customizations in the Dynamics CRM organization.

Admins for CRM Online can use their Office 365 global administrator role to create and edit users, reset user passwords, manage user licenses, manage domains, and assign admin permissions to other users in their organization, among other things.

However, if admins want someone else to do these administrative tasks, then they can delegate this role to an authorized CRM partner.

When admins authorize a partner to take on this role, the partner is referred to as a delegated admin. A delegated admin can perform routine tasks such as adding users and resetting passwords, or more complex tasks such as adding a domain. A delegated admin can have access to multiple tenants, which can simplify and consolidate tenant management.


You can see the new Delegated Admin user in Microsoft Dynamics CRM Online revisions 2040 or greater or in Microsoft Dynamics CRM Online 2015 Update 0.2. This user won’t appear in standard provided views. You must create a custom view to see it.

To create a simple custom view to see the delegated admin user:

  1. Go to Settings > Security > Users.
  2. Choose Select a view (Drop-down button) and then choose Create Personal View.
  3. Verify Users is selected in Look for.
  4. Choose User > Contains Data, and then choose Results.


How to get authorized as a delegated admin

CRM partners can be authorized to be delegated admins for a company in several ways:

  1. A partner can offer the customer to become a delegated admin for their account by sending a link to the delegated admin offer. The customer will need to accept and sign in with their Office 365/Microsoft Dynamics CRM Online credentials.
  2. A partner can send the customer a purchase offer link with delegated admin selected as part of the offer. The customer will need to sign up for the offer and accept the delegated admin offer.
  3. A partner can create a trial invitation link to Microsoft Dynamics CRM Online and invite the customer to the trial via a link in email or a link on the partner’s website. The trial invitation can include delegated admin if the prospect chooses to accept.

Some of the restrictions of the delegated admin

The delegated admin has as default the system administrator role in the Dynamics CRM organization. This allows him to own records, do customizations etc. Nonetheless, I have discovered some restrictions inside the system for this user, feel free to share yours in the comments:

  • The delegated admin cannot be linked to your Outlook client
  • The delegated admin cannot have an image in the CRM system
  • The delegated admin has the access mode of “delegated admin”. This kind of access mode isn’t even mentioned in the technical documentation. This restricts him to change the access mode of other users, e.g. he cannot set a CRM user to non-interactive access mode. So if you’re setting up a CRM user to be used as a connector user, you’ll still need the help of the organization’s system admin.
  • The delegated admin cannot perform CRUD operations through the web service endpoint. (UPDATED on 21/11/2016, based on comment of Winston)

In case you forgot about Access modes…

Access modes specifies the type of access that this user has to Microsoft Dynamics CRM. This is sometimes referred to as the type of user.

  • Administrative – The user has access to the Settings area but does not have access to the Sales, Marketing, and Service areas.
  • Non-Interactive – The user can access the system but only through the Web service.
  • Read – The user has read-only access.
  • Read-Write – The user has both read and write access.
  • Support User – The user was created by the Microsoft Dynamics support team.

Wednesday, April 12, 2017

How to auto document SSRS reports

Creating adequate documentation for any IT project is a challenge, particularly with SSRS where an organization can have literally hundreds or thousands of reports in production. Writing the documentation alone can be a formidable task, not to mention keeping it up-to-date when changes are made.

Fortunately, the SQL Server ReportServer.dbo.Catalog table contains data that can be used to create a documentation system that is automatically updated as report changes are made.
Microsoft does not document or support querying the ReportServer.dbo.Catalog table.


...but it contains a lot of useful information. The Content field, for instance, contains the entire RDL file that defines each report. The following query...
SELECT        Name as ReportName
,CONVERT(Varchar(Max),CONVERT(VARBINARY(MAX),Content)) AS ReportContent
FROM 
ReportServer.dbo.Catalog Where Content is NOT NULL

...extracts the Content field to reveal the RDL XML code.


This query...

WITH XMLNAMESPACES ( DEFAULT 'http://schemas.microsoft.com/sqlserver/reporting/2008/01/reportdefinition',
'http://schemas.microsoft.com/SQLServer/reporting/reportdesigner' AS rd )
SELECT DISTINCT ReportName            = name
,CommandText         = x.value('(Query/CommandText)[1]','VARCHAR(250)')
FROM ( SELECT C.Name,CONVERT(XML,CONVERT(VARBINARY(MAX),C.Content)) AS reportXML
      FROM ReportServer.dbo.Catalog C
     WHERE C.Content is not null
      AND C.Type = 2
          ) a
CROSS APPLY reportXML.nodes('/Report/DataSets/DataSet') r ( x )
CROSS APPLY x.nodes('Fields/Field') f(df)
ORDER BY name 
...extracts the SQL commands embedded in the RDL code.

If you cannot get the above two queries to work, you probably need to change the schema in the queries to the schema being used by SQL Server on your SQL Server installation.
Open an SSRS report in Visual Studio and select View-Code from the main menu.
Change the schema in the queries to the one in the SSRS code.

The following query is used in the zipped  "SSRS Dynamic Documentation" SSRS report RDL resource file attached to this article.

BEGIN TRY
DROP TABLE #ReportList
END TRY

BEGIN CATCH
END CATCH

BEGIN TRY
DROP TABLE #ReportParameters
END TRY

BEGIN CATCH
END CATCH

BEGIN TRY
DROP TABLE #ReportFields
END TRY

BEGIN CATCH
END CATCH

SELECT
Name,Path
INTO #ReportList
FROM ReportServer.dbo.Catalog
WHERE Content IS NOT NULL
ORDER BY Name;

SELECT DISTINCT Name as ReportName
,ParameterName = Paravalue.value('Name[1]', 'VARCHAR(250)')
,ParameterType = Paravalue.value('Type[1]', 'VARCHAR(250)')
,ISNullable = Paravalue.value('Nullable[1]', 'VARCHAR(250)')
,ISAllowBlank = Paravalue.value('AllowBlank[1]', 'VARCHAR(250)')
,ISMultiValue = Paravalue.value('MultiValue[1]', 'VARCHAR(250)')
,ISUsedInQuery = Paravalue.value('UsedInQuery[1]', 'VARCHAR(250)')
,ParameterPrompt = Paravalue.value('Prompt[1]', 'VARCHAR(250)')
,DynamicPrompt = Paravalue.value('DynamicPrompt[1]', 'VARCHAR(250)')
,PromptUser = Paravalue.value('PromptUser[1]', 'VARCHAR(250)')
,State = Paravalue.value('State[1]', 'VARCHAR(250)')


INTO #ReportParameters
FROM ( 
SELECT top 1000 C.Name,CONVERT(XML,C.Parameter) AS ParameterXML
FROM  ReportServer.dbo.Catalog C
WHERE  C.Content is not null
AND  C.Type  = 2
) a


CROSS APPLY ParameterXML.nodes('//Parameters/Parameter') p ( Paravalue )
ORDER BY ReportName,ParameterName;
WITH XMLNAMESPACES ( DEFAULT 'http://schemas.microsoft.com/sqlserver/reporting/2008/01/reportdefinition', 'http://schemas.microsoft.com/SQLServer/reporting/reportdesigner' AS rd )

SELECT DISTINCT ReportName = name ,DataSetName = x.value('(@Name)[1]', 'VARCHAR(250)')
,DataSourceName = x.value('(Query/DataSourceName)[1]','VARCHAR(250)')
,CommandText = x.value('(Query/CommandText)[1]','VARCHAR(250)')
,Fields = df.value('(@Name)[1]','VARCHAR(250)')
,DataField = df.value('(DataField)[1]','VARCHAR(250)')
,DataType = df.value('(rd:TypeName)[1]','VARCHAR(250)')
,ConnectionString = x.value('(ConnectionProperties/ConnectString)[1]','VARCHAR(250)')

INTO #ReportFields
FROM ( SELECT C.Name,CONVERT(XML,CONVERT(VARBINARY(MAX),C.Content)) AS reportXML


FROM ReportServer.dbo.Catalog C
WHERE C.Content is not null
AND C.Type = 2
) a

CROSS APPLY reportXML.nodes('/Report/DataSets/DataSet') r ( x )
CROSS APPLY x.nodes('Fields/Field') f(df)
ORDER BY name

SELECT
a.Name AS ReportName
,a.Path
,SUBSTRING(a.Path,1,LEN(a.Path)-LEN(a.Name)) AS ReportFolder
,'http://msl-db12/Reports/Pages/Report.aspx?ItemPath='+REPLACE(SUBSTRING(a.Path,1,LEN(a.Path)-LEN(a.Name)),'/','%2f')+REPLACE(a.Name,' ','+') AS ReportLink
,'User Input' AS FieldType
,b.ParameterPrompt AS DataSetOrPromptName
,b.ParameterName AS FieldOrParameterName

FROM #ReportList a
LEFT OUTER JOIN #ReportParameters b ON a.Name = b.ReportName
WHERE b.ParameterName IS NOT NULL
UNION
SELECT
a.Name AS ReportName
,a.Path
,SUBSTRING(a.Path,1,LEN(a.Path)-LEN(a.Name)) AS ReportFolder
,'http://msl-db12/Reports/Pages/Report.aspx?ItemPath='+REPLACE(SUBSTRING(a.Path,1,LEN(a.Path)-LEN(a.Name)),'/','%2f')+REPLACE(a.Name,' ','+') AS ReportLink
,'Data Point' AS FieldType
,b.DataSetName AS DataSetOrPromptName
,b.Fields AS FieldOrParameterName

FROM #ReportList a
LEFT OUTER JOIN #ReportFields b ON a.Name = b.ReportName
WHERE b.Fields IS NOT NULL
ORDER BY Name,Path,FieldType,ParameterPrompt,ParameterName

Deploy this SSRS report to your report server with a user that has read privileges on the ReportServer databse after changing the schema referenced by the DataSet1 query, if necessary.
When you run the report, it will display the name of each report, the report server folder in which it resides, a link to the report and a listing of all the datasets,fields and parameters used by the report.

When you click the report link, you will be taken to that report.

More Than One Form Was Opened at Once for the Lookup Control

In Dynamics 365 for Finance and Operations, when subscribing to a lookup event to modify an existing lookup on a form control, you must...